How To Remove 3D Print From Bed?
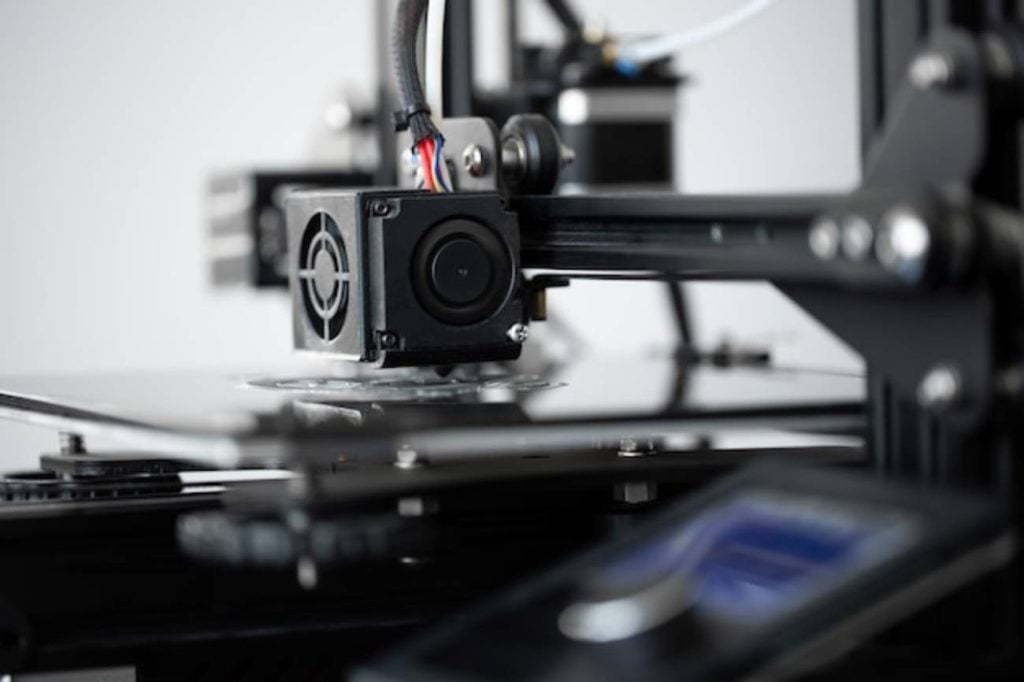
It is the biggest challenge for 3D printing enthusiasts how to remove a 3D print from the bed. This issue usually occurs because the printed object often adheres strongly to the print bed, making it difficult or even impossible to remove without causing damage.
With the help of 3D printing technology people have learned ways to create and manufacture products. Sometimes it becomes difficult to remove a 3D print from the bed.

This article will provide helpful tips and tricks to make removing 3D prints from the bed easier. It will discuss what materials work best for 3D printing and different techniques that can be used to remove prints. Additionally, some general information regarding printer beds will be provided.
5 Best Methods: How To Remove 3D Print From Bed?
Headings
One of the most important steps is removing the finished print from the print bed for 3D painting. If you don’t remove the print correctly, you risk damaging the print or the print bed.
In addition, if you’re printing with a material like ABS, which tends to warp, removing the print from the bed can be even more challenging. Here are some common methods to remove the 3d painting.
You may also like: Razer Blade 15 2018 H2
Yank or Knock it off and Leverage the Moment of Force
Yanking or knocking it off is one of the most common ways to remove the 3d painting. You can use a sharp object, such as a spatula or scraper.
However, it’s important to exercise caution when using this method. It can damage both the print and the bed surface. It’s best to use this method on flat surfaces where there are no overhanging parts.
Another way to remove 3D prints from the bed is by leveraging the moment of force. This involves applying pressure at a specific point on the print until it pops off from its base.
You can use your fingers or any flat tool, like a putty knife, for this method. It’s crucial not to apply too much force since you may break delicate parts or damage them in any other way.
Ultimately, removing 3D prints from their bed requires patience and careful handling. The delicate nature of some designs means that they’re more prone to breakage and warping if removed too quickly or roughly.
With practice and experience, you’ll find an effective method that works for you, whether it’s yanking or leveraging force moments – just be sure always to prioritize safety above all else.
Dissolve the Adhesive Using Alcohol
Dissolving the adhesive using alcohol is a quick and effective way to remove 3D prints from the bed. The method works by dissolving the adhesive bond that holds the print to the bed, making it easier to remove without damaging either. To use this method, rubbing alcohol, a spray bottle or dropper, and a scraper tool are required.
Firstly, mix equal parts of rubbing alcohol and water in a spray bottle or dropper. Then spritz or drip enough solution onto the base of your 3D printed object where it meets with the bed.
Allow it to penetrate for about 5-10 minutes before using your scraper tool to remove any remaining residue. Be gentle when scraping as excessive force may damage your print.
This approach is particularly useful for those who work with difficult materials like ABS which can be tricky to detach due to its high adhesion properties.
Moreover, this technique is also environmentally friendly as rubbing alcohol evaporates quickly leaving behind no residue on both objects’ surfaces – which makes it an ideal solution for frequent users of 3D printers.
Rinse with Water
If you used a water-soluble adhesive on your print bed, like a glue stick or hairspray, it only makes sense to wash it off afterward with water. Submerge the whole print bed in some water until the adhesive melts off. Lukewarm water is best for this process, but be careful not to get it beyond 50 °C, or else you might damage the print bed. Here are the steps to follow:
- Turn off the printer and unplug it from the power source.
- Remove the print bed from the printer.
- Submerge the print bed in lukewarm water.
- Wait until the adhesive melts off.
- Dry the print bed thoroughly before replacing it in the printer.
Use a Spatula or Putty Knife
If your 3D print is stuck to the bed, you can use a spatula or putty knife to pry it off. Here are the steps to follow:
- Turn off the printer and unplug it from the power source.
- Remove the print bed from the printer.
- Carefully insert the spatula or putty knife under the print.
- Slowly work the spatula or putty knife around the print, gently prying it off the bed.
- Be careful not to damage the print or the print bed.
Use A Heat Gun
To remove a 3D print from the bed, start by heating up your heat gun and holding it about an inch away from the base of your print for several seconds.
This will soften up any plastic that may be sticking to your bed. Once you’ve heated up one area, use a scraper tool to gently pry up that section of your print. Repeat this process in small sections until you’ve removed your entire print.
Conclusion
In conclusion, removing 3D prints from your bed doesn’t have to be a difficult task. With a few simple items, the right technique, and some patience, you can easily remove these pesky prints and get a good night’s rest!
Plus, you’ll feel proud of having tackled such an interesting challenge with success. So don’t wait around any longer! Get out there and start removing those 3D prints from your bed now!


